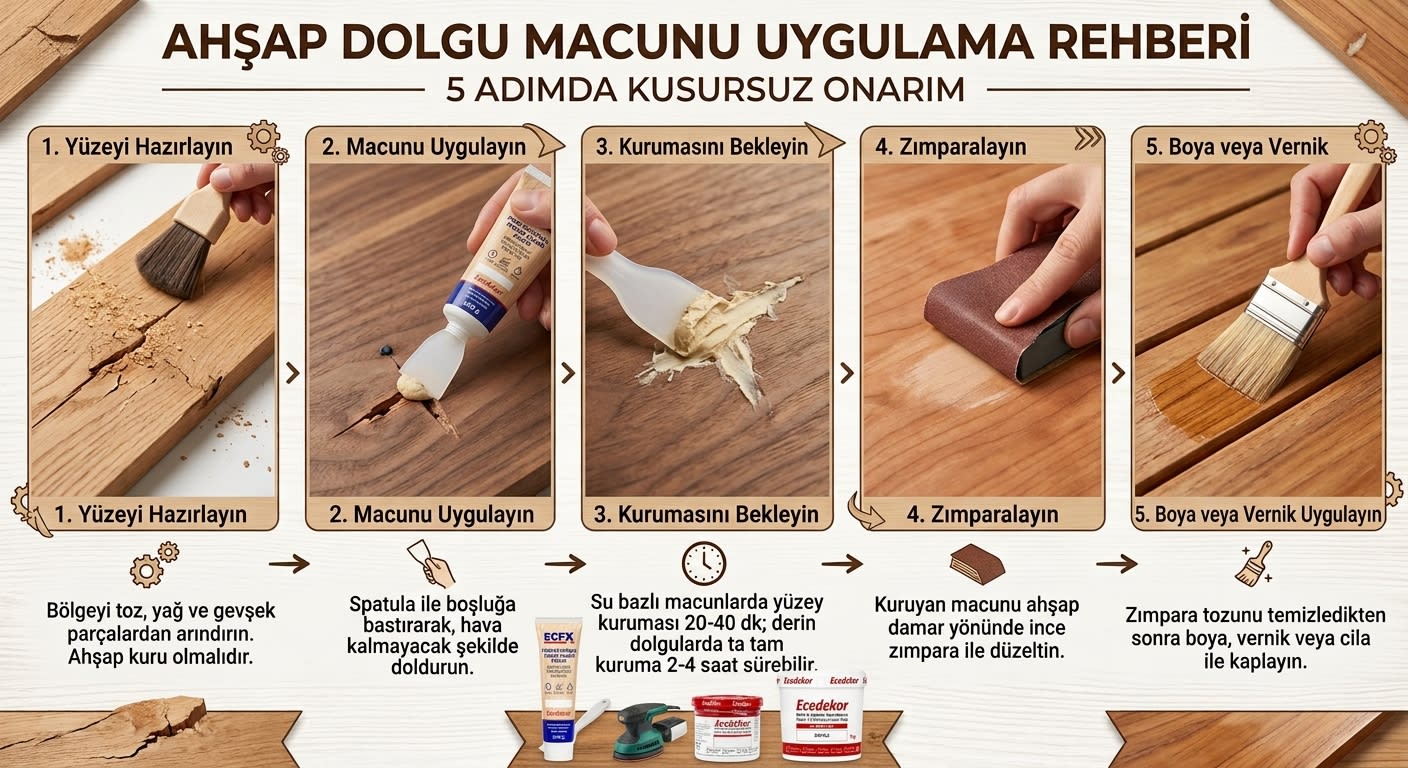
Wood filler is a repair material used to fill cracks, holes, scratches, and knot holes in wooden surfaces; once dry, it can be sanded and painted over. Proper application consists of five steps: cleaning the surface, filling the gap by pressing the putty into it with a putty knife, allowing it to dry, smoothing it with fine-grit sandpaper, and coating the surface with paint or varnish. In this guide, we explain each step along with tips tailored to the type of surface.
Materials Needed
- Wood filler: Depending on the size of the repair area, choose a convenient tube (for small repairs), a 200-gram jar (for workshop use), or a 1-kilogram bucket (for hardwood floors and heavy-duty use). Ecedekor filler and repair compounds contain no harmful chemicals and are vegan-friendly; they are safe to use indoors.
- Spatula: A flexible plastic spatula for small repairs, and a steel spatula for large surfaces.
- Sandpaper: 180–240-grit fine sandpaper or a sanding sponge.
- Cleaning supplies: A lint-free cloth, or a slightly damp sponge if necessary.
- Top coat: Wood paint, varnish, or lacquer (to make the repair invisible).
Step-by-Step Application
1. Prepare the Surface
Remove dust, grease, and loose wood particles from the area to be repaired. If there are any old paint or varnish residues, remove them with paint stripper or sand them off; the filler adheres much better to bare, clean wood. Do not apply to a damp surface—make sure the wood is dry.
2. Apply the Filler
Pick up some filler with the tip of a putty knife and press it into the gap, filling it completely so no air pockets remain. Leave enough putty to extend slightly beyond the crack or hole; it may shrink slightly as it dries, and any excess can be easily sanded off. For deep gaps (more than 5 mm), apply the putty in thin layers rather than all at once, and let each layer dry before applying the next.
3. Allow Time for Drying
Water-based wood fillers typically reach surface dryness in 20–40 minutes when applied in thin layers; for deep fills, full curing may take 2–4 hours. Ambient temperature and humidity directly affect the drying time. Refer to the values on the product label for exact times. Do not start sanding until the filler is completely dry; otherwise, the surface will remain rough and the sandpaper will clog.
4. Sand
Sand the dried putty with 180-240-grit sandpaper until it is flush with the wood surface. Move the sandpaper in the direction of the wood grain; sanding marks perpendicular to the grain will show through the paint. If you can’t feel any unevenness when running your hand over the surface, the repair is ready.
5. Apply Paint, Varnish, or Lacquer
Wipe away the sanding dust with a clean cloth and coat the surface with paint, varnish, or lacquer. If color matching is critical, choose a filler color that most closely matches the wood’s tone—Ecedekor offers more than 30 color options. If you’re using a clear varnish, color selection is even more important because the filler color will show through exactly.
Tips Based on the Surface
Furniture Repair
Small amounts of filler are sufficient for screw holes, impact marks, and worn corners. When repairing corners, apply the filler in layers, shaping it to match the form with each layer. For detailed product options, check out the wood filler and repair compounds category.
Hardwood and Wood Flooring
For gaps between parquet planks and surface cracks, bucket-shaped putty is both economical and practical. When repairing floors, do not step on the putty until it has fully dried. For the finer points of parquet repair, read our parquet repair guide.
Door and Window Frames
Knots and joint gaps are more exposed to external factors. Ecedekor wood filler and repair putty can be sanded, painted, and varnished; for exterior frames, apply 2–3 coats of varnish or lacquer over the repair to protect the putty from moisture and sunlight. See our outdoor use guide for details. Priming putty-filled areas before painting helps even out the color of the topcoat.
Common Mistakes
- Applying to a dirty surface: Dust and grease prevent the putty from adhering; the repair will flake off quickly.
- Applying a deep layer in a single pass: The outer layer dries while the inside remains wet, causing cracking and sagging.
- Sanding before it’s dry: The surface becomes uneven, and the sandpaper clogs.
- Choosing the wrong color: The putty color will show through the clear varnish; match it to the color chart.
- Leaving it unprotected outdoors: For outdoor repairs, do not skip applying a coat of varnish or lacquer over the putty; the protective layer provides resistance to moisture and UV rays.
Frequently Asked Questions
How long does wood filler take to dry?
Thin layers of water-based products typically reach surface dryness in 20–40 minutes; for deep fills, full curing may take 2–4 hours. Temperature and humidity affect the drying time; check the product label for exact values.
Can paint or varnish be applied over wood filler?
Yes. Once the filler is completely dry and sanded, you can apply wood paint, varnish, or finish. Since the filler color will show through transparent finishes, you should choose a color that matches the wood’s tone.
Can deep holes be filled in a single application?
Not recommended. Holes deeper than 5 mm should be filled in thin layers, allowing each layer to dry completely before applying the next. Applying a thick layer all at once can cause cracking and sagging.
Can wood filler be used outdoors?
Yes. Ecedekor wood filler and repair putty is designed to be sanded; when a finish or varnish is applied over the repair, it can be safely used outdoors. Do not leave it outdoors without a protective coating; moisture and sunlight will degrade the putty if left unprotected.
Should old paint be removed before applying the putty?
Loose and peeling paint in the repair area must be removed. Minor touch-ups can be made over sound paint, but the best adhesion is achieved on bare wood. You can use a gel paint stripper to quickly remove old paint.
Which packaging makes sense for bulk purchases?
For workshops and small repairs, the 200-gram jar/tube is the most economical option per kilogram; for hardwood floors and intensive professional use, the 1-kilogram bucket is the most economical option per kilogram. For dealership and wholesale terms, please visit our dealership page.